A Formal Affair
Wedding season has begun. Yes, it is nearly March (hard to believe it is nearly March!) but the weekends are beginning to fill with weddings. What’s new? What’s exciting? The beautiful hand-tied bridal bouquet has been “the” bouquet for years. And, yes, it is still quite popular. But, there is more… The cascading bouquet is making a comeback and dramatic glamour is returning with the formal linear style. Have fun with our “how-to” demonstration as you learn how to create a fabulous, "Formal Bridal Bouquet".

STEP ONE:
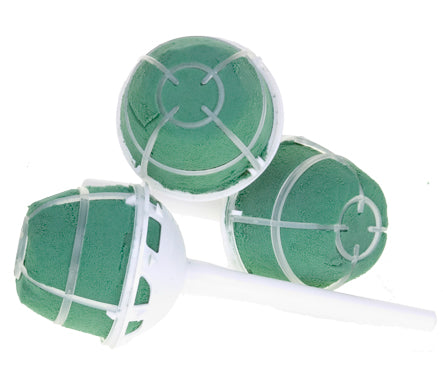
Creating a formal linear bouquet is easiest when based upon a bridal bouquet holder. The straight handle version is my personal favorite. It balances nicely in the bride’s hand. Of course, the plastic is UGLY!
The first step is to hide as much of the hideous white as possible. Yes, I do feel that strongly about it. Galax leaves and Super 77 3M spray glue to the rescue! You will need about a dozen leaves. Place 4-5 leaves in the back holes to create a framing green collar for the back. Cut the stems off 5-7 galax leaves and lightly spray the back side with the Super 77. When tacky, wrap the leaves around the base of the handle and work your way upward to cover all the plastic. Your final leaves will cover the back of the holder and extend onto the previously-inserted leaves.
Voila: A fully-concealed holder ready for designing!
A little hint: The easiest way to know when spray glue is ready to use is to lightly tap the leaf with your finger. If it sticks to you, it is ready to use.
STEP TWO:
You can create a contemporary drape for you bouquet with hyacinth florets and bear grass. Just thread individual blooms onto the blades of grass. A small dab of Oasis Floral Adhesive will hold it in place and prevent it from sliding off.
You will want to hunt out the best blades of grass for this. No unsightly brown spots, not too thin, not too thick – just right! Experiment until you get just the drape you desire.
STEP THREE:
You can wire the grass together for easy insertion or, cheat like I did and use a pick machine to tightly cluster the ends together. You may find it easiest to insert it in two or three groupings. Place them close together so it appears to be all one insertion. You don’t want a wild, random feel to this. It should appear tight, controlled, and elegant.
Add the rest of the hyacinth stem at the same insertion point to expand upon the illusion of falling florets. The stem can be a bit fat and fibrous. Again, it is easier to go ahead and wire it before insertion. If you are unsure of the stability, add a dab of cold glue at the insertion point. This will stabilize it just where you want it.
STEP FOUR:
Continue adding rhythmic, flowing lines extending in all directions. Take care to leave ample negative space and to carry each line from one side, through the accent area and out the other side. This is the trickiest part of the bouquet and requires a firm understanding of the elements and principles of design to get it perfect.
The upper left extension is a forsythia branch that has begun to leaf out. All remnants of the yellow blooms have been stripped away. Notice how it gracefully arches up and back, a reverse of the downward drape of the bear grass. The two elements combine to create a soft Hogarth curve. The secondary line at the base is also a relaxed Hogarth done on a bit more horizontal plane. The left side is meyerii (fox tail fern) and the right side is Israeli ruscus.
STEP FIVE:
Two lily buds, just beginning to open, are shadowed to create the accent area. The hues of soft pink and light green are the perfect springtime complementary color harmony.
At this point, the bouquet is done – except for the final enhancements…

STEP SIX:
Enhancements… that’s the word for everything else. Makes it sound simple doesn’t it? Actually, it is the simple part.
The beginning of the bouquet – lines and accent - requires strong knowledge of design techniques and basic mechanics. Once that is correctly done, the “enhancements” will all fall into place.
To finish, 5 lavender roses are clustered tightly on the left. 2 stems of moon shade mini carnations are extended to the right. A tight basing of purple statice pulls forward in the front. Each of these materials reach inward to connect in the accent area beneath the lilies.

STEP SEVEN:
The finished bouquet is a graceful design filled with dramatic movement. As the bride walks down the aisle, the hyacinth florets will softly sway. The budding leaves of the forsythia symbolize the new life the couple is entering and the fragrance of the lilies and hyacinth fill the room with romantic ambiance.
For display at the wedding reception, the Oasis Bridal Bouquet stand is just perfect. The curve of the metal frame adds yet one more dramatic line to the bouquet. The
Thank you for sharing this gorgeous cascading bouquet in a formal linear style. If you would like to lean more, join us in the Classroom or Online and study the theories and techniques of design with the Floral Design Institute Instructors.