Brilliant Boutonnieres
Prom Season is just around the corner, for some it has already begun. What once was a single weekend (to the dismay of florists, often Mother's Day weekend) can now run from March to Memorial Day. With the surge of Social Media, like Pinterest and Instagram, prom-goers are spending much more time planning their dream evening. Young women are looking for the perfect dress and young men, just like the women, are looking for a way to set themselves apart from the crowd. What better way than with the boutonnière? Here is a little inspiration to jazz up prom season, and hopefully save your fingers from all that wiring and taping. Enjoy!
STEP ONE:
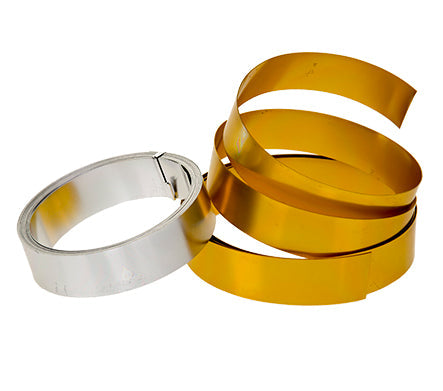
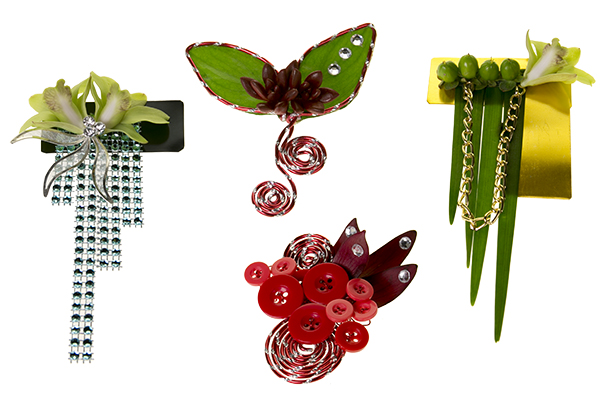
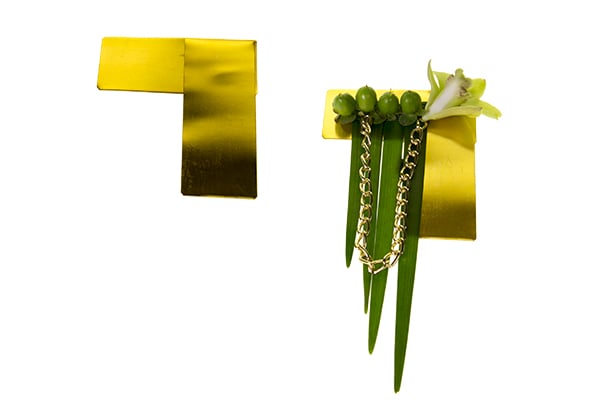
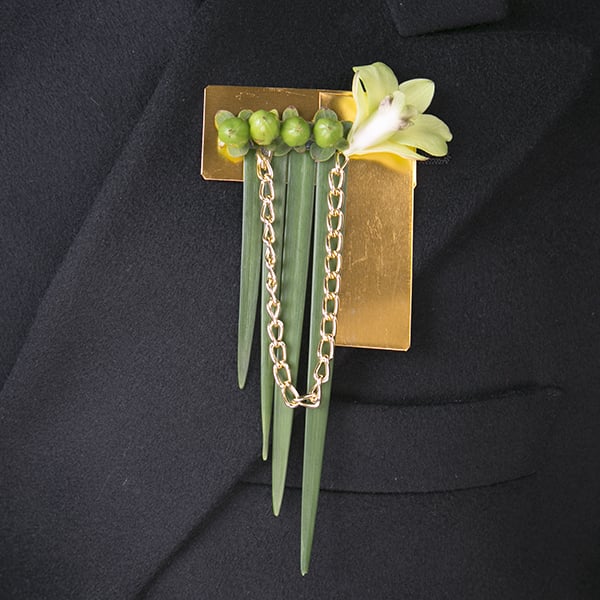
Gold Elegance
With all of these designs I began with a base easily made ahead of time. Here I have used 1 inch flat wire and UGlu to create an interesting shape. If you are not already using UGlu, you must begin! This stuff is AMAZING - and it makes life so easy with no mess or waiting for glue to dry. UGlu will quickly become your best friend during prom season and beyond.
STEP TWO:
To finish this design, add a few trailing leaves and berries along with a single orchid bloom and a bit of chain for sparkle — all with UGlu of course; instant glamour and impact.
STEP THREE:
Dazzling Orchids
The best part of creating these various bases is that they can be made up in advance, then once the day of pick up comes around all you have to do is glue a few orchids in place, add a bit of sparkle and on to the next one you go.
STEP FOUR:
A helpful hint when working with the 1 inch flat wire: blunt the corners with a bunch cutter; it will take away any sharp corners and make for a smooth finished product, because the wire is aluminum it very easy to manipulate and mold into any form.
STEP FIVE:
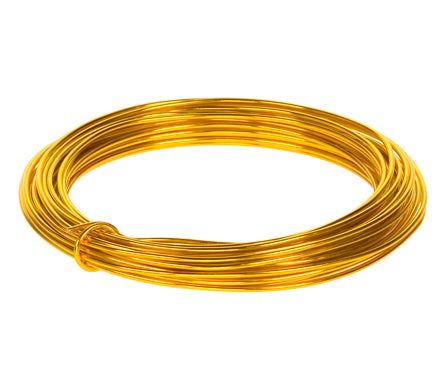
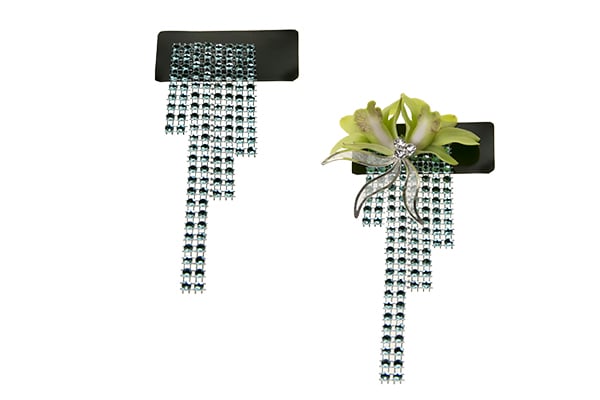
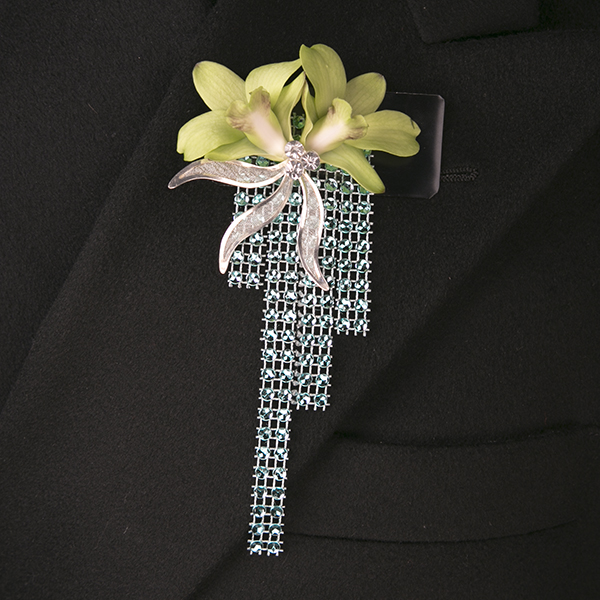
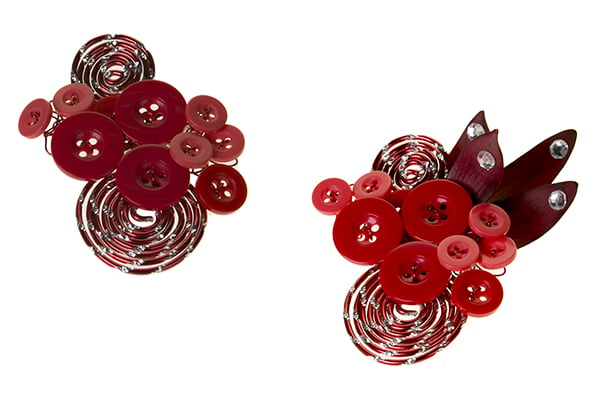
Party Pop
Here you will need a rounded pair of jewelers needle nose pliers. Traditional needle nose pliers have ridges and flat sides. These will mar the metal finish and possibly bend the wire in ways that you are not intending. I used the Oasis diamond wire, but any of the Oasis aluminum wires would work beautifully for this style of boutonniere.
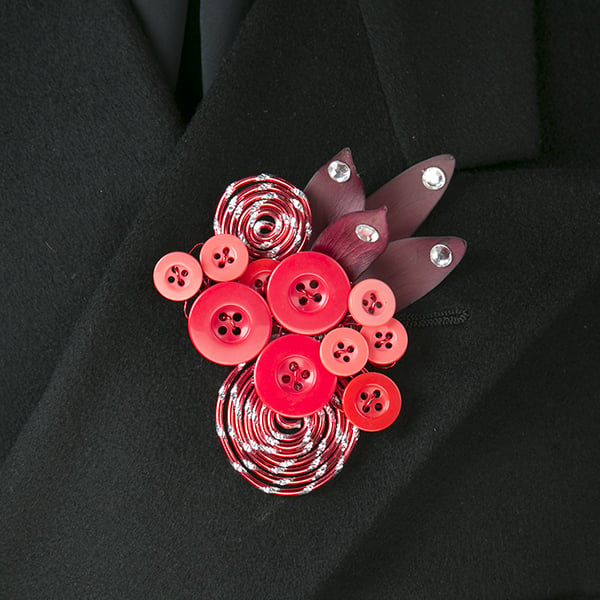
STEP SIX:
First you want to create the top and bottom coils. Once you have the size that you like, take a length of Oasis buttons and wad them into a shape you like. I know—wad is a very technical term—giggle, but really just play around with the materials until you have something you like. This is the fun part! When you are happy with your shapes, UGlu them in place for a finished base. To finish add a few leucadendron leaves and some sticky rhinestones. Is there such a thing as too much sparkle? I think not!
STEP SEVEN:
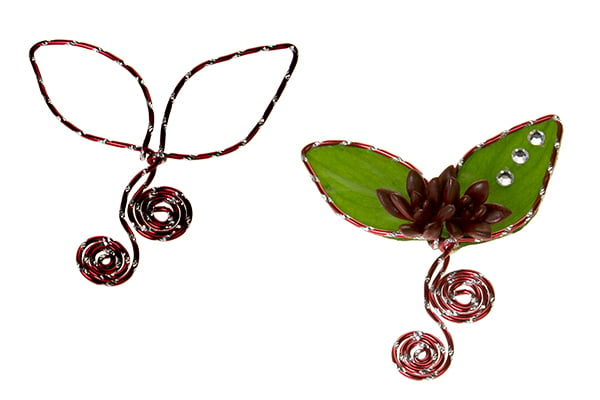
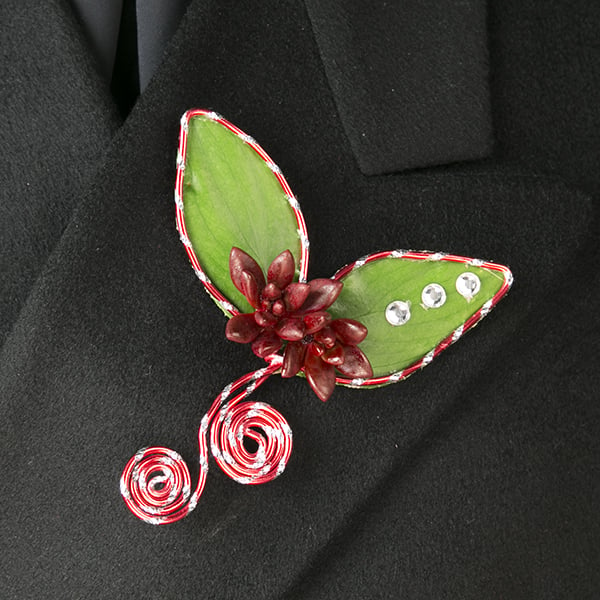
Whimsical Succulents
This has to be one of my new favorite tricks--I am so excited to share it with you! With succulents being so popular, I thought they would be great to incorporate into a boutonniere—but of course they couldn’t be just regular succulents--I had to spray them for a bit of added fun! To begin this creation I carefully ran a thin layer of Oasis Floral Adhesive around the back side of the wire leaves, when the glue became tacky I placed the Israeli ruscus. Once the glue was dry I went back in and trimmed the excess to make them fit perfectly. Then cold glue the succulents in place, add a few gems and you have an interesting and trendy little creation.
STEP EIGHT:
To secure each of the boutonnieres into place attach a few UGlu dashes to the back of the base. You could also use a UGlu strip. Be sure to leave the paper pull tab on for the girls to be able to attach the bout to their date.
I know what you are thinking—this will not hold, or that it will get stuck to the fabric. I am here to tell you it works seamlessly. No more pins and lip hanging boutonnieres. The UGlu attaches beautifully and pulls off without any residue or harm to the fabrics. I am telling you this stuff is AMAZING! If you are unsure, give it a try for yourself, I did and it made a believer out of me.
We would love to see what grand creations you are making for Prom this year; share with us via Facebook or Instagram. Add the hashtag #FDI and #FloralDesignInstitute so we can find you. If you have questions about any of these designs, give me a call as I would love to chat with you!
Thank you for sharing these unique and stylish techniques for creating Brilliant Boutonnieres. If you would like to lean more, join us in the Classroom or Online and study the theories and techniques of design with the Floral Design Institute Instructors.